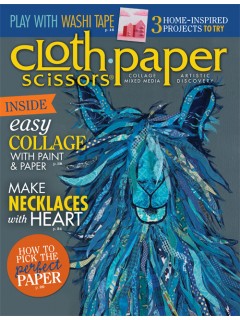
Pages

  • Home
Facebook Instagram Twitter
Studio Kit
Ta dah!!!!


lol. I know, I know, you're probably saying "But Kit, it looks exactly like the old one!"  And if you are, I'm delighted, because THAT WAS THE POINT of the last five weeks.  Ai yi yi!

The interesting thing about this whole process was that the original one, in encaustic wax, took about ten minutes.  The new one, which had to be hand drawn, blown up, copied, traced, painted, fused, cut, traced, etc. (ad nauseum) as I tried different fabrics, tried to distress said fabrics, tried different ways of applying them to the background, and struggled, STRUGGLED I SAY with getting the proportion of the face right -  all in an effort to give the face A: the distressed look of the original and B: the proportionate look of the original has literally taken weeks and weeks of hours-every- day-work.  


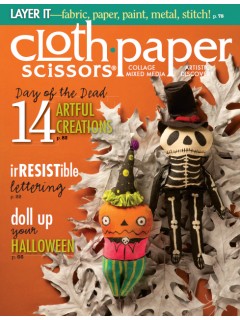
Here is the old one, in encaustic wax, to compare. Pretty good, huh?

I finished the background and background stitching on the supersized version at the beginning of May, including hand sewing on all of those letters in addition to fusing (again, I was afeared that the rolling and unrolling and shipping around the world would make them fall off), plus the hand stitched elements on this on a much larger scale, took forEVER.

Now, thanks to Jenny Wood and all of your helpful suggestions, it's finally done and looks as near as I can get to the original, using fused Pellon stabilizer (painted and then having some of the paint blotted up) as the base for that face.

(By the way, I DID try the original encaustic version too, but every time I rolled it up, more wax flaked off, so I couldn't take the risk. )


Here, you see the original in the left hand corner, with the scaled up version in behind it.  As you can see, I STILL didn't get the proportion of the face quite right (it should be still larger), but given my time constraints (it has to be sent today) it was the very best I could do.


I thought about trying one more time to get the face the right size (on Tuesday, when this version of the face was completed) and decided I didn't have time - and boy - I was right!

Because, after the face was finished, I had to hand stitch it down, plus handstitch all the "blood", then I handstitched a few more circles to make up for the empty space, plus added another line of handstitching around the sharp angles on the left - and then I STILL had to close off the open side (I did an envelope back for this piece); so  I finished the hanging sleeve and the bag for shipping last night, just before midnight.  

That is cutting it TOO close!


And now, off it goes!  *le phew* (I send it on its way with a kiss. *s*)

New work next week.  Hurray! :)

Photobucket
12
Share
How helpful and generous all of you are!

After my last post, I had several (nearly ten!) emails from people who privately offered me their collective wisdom in solving my "burning issues".  I'll start by telling you how I temporarily solved them, and then share all of their great ideas!


So, when I left you last, I was trying to figure out a couple of things:
a:     where to get lutradur/what to use instead in my limited time frame; and
b:     what to use instead of  Margaret Beal's heat tool.

The unspoken issues I had were:

a:    was it better to paint the substrate first and then put the fusible and then cut it out?
b:    should I put the fusible on before or after I cut and paint, or can it all be done at the same time?


To begin, when I asked Jennie where she got her Lutradur, she explained that, like me (I'd been looking for it for a project for Fire a couple of months ago) she hadn't been able to find it anywhere in Canada.  So when she was in the UK a couple of weeks ago, she got a bolt of it.

When she pulled it out to cut a piece off for me, I said "It looks like Pellon stabilizer!"
And SHE said - "It's made by Pellon".  And I smacked myself in the head, because I have three bolts of the stuff myself, in different weights, that I bought at the Creativ Festival a couple of years ago.

At the time, I thought I was going to do a lot more thread painting (I was very taken with an exhibition of it I had seen during Quilt National in 2009) but had never really gotten 'round to it.


When I got home, I realized that none of my weights were exactly like hers, but they were probably close enough to bright, so I went for it.

The first experiment was with the heaviest of the weights I had.  I cut it first, and then painted it, and THEN added the fusibile and cut it out a second time. (Which is the first pic in this post.)

Then I tried painting the stabilizer, and fusing it, then cutting it, but I couldn't see through it without a light box. I don't have one, so I used my drafting table (glass top) and a desk lamp underneath - but it's not a user-friendly option unless you have a lightbox, so I wouldn't recommend painting the stabilizer first.
And speaking of, what did I cut it with, you ask?  

Well, Jennie had very generously offered to lend me her burning tool to complete the project.

However, I had done some research, and decided that its closest cousin was the Dremel Wood Burning Tool Kit (which had an attachment with a very fine point - more on that later)


I also had a very light weight Pellon, nearly translucent, that had some fusible on it already. I had been fusing that Pellon to delicate silks and lightweight chiffons to enable me to work with them more easily in other applications in the past, so thought I'd give that one a go.

I knew that the small amount of fusible on it would be useless in this particular application, so I fused the Steam-A-Seam to it, cut it to size, and then peeled off the back, using that bit of sticky-ness to adhere it to the glass.


Then I slid the whole over my  image (I took the original sketch, blew it up and darkened it at a professional copy place) and commenced to cut.  It worked a dream! (And my head is already filled with other applications for my Pellon and my heat tool!)

You can see that I used the tool to make more marks to "scuff it up" as you may remember the orignal rendering looked very "abused" and I wanted that look rather than the "brand spanking new" look I got with other fabrics.


Here it is all cut on on the glass - remember, it already has the fusible attached!

Now - here are the hints from all of the generous people!

No sooner did I post, than Arlee Barr wrote me and suggested that I use the Walnut Hollow "Textile Tool", and a few people wrote and suggested the Creative Versa Tool by the same company. Liniecat sent me several emails with different suggestions for both tools and sources for Lutradur, and Beth Berman sent me info on how to enlarge my image. Others wrote me and made other helpful suggestions as well, from soldering irons to wood burning tools, a couple of you also suggested the Dremel Wood Burning kit I had already found.

Ladies - all of you - I'm truly touched by your generosity of spirit and helpfulness! Apparently, there's nothing we can't solve together. :)


As for me, after I cut my fused Pellon, I painted it - right on the glass!

To find out whether it worked, check back in on Friday.  Till then...

Photobucket
5
Share
So, when I went to Jennie's house last Thursday, she introduced to me to her trick to make her precise work - Lutradur and her secret weapon!  Though Jennie's work often uses Lutradur as one of it's many elements, and though I had a chance to work with a bit of it as part of the challenge when I made "Ontology of A Rabbit", I didn't realize how amazin' the stuff is!


She had asked me to come prepared with my sketch of Travyon blown up for our experiments (here, it's about 14 inches x 10).  We taped the image to the table and then put it under a piece of glass, and then put a piece of Lutradur on top...


And then she introduced me to her secret weapon! A burning tool from Margaret Beal - with whom she'd taken a class a few years ago. Now since the tool is from the UK, we had to use it with both a converter (so it could be used in North American outlets) AND a booster so it would get hot enough, and it sure did.  "Cuz check it out!


Just from tracing the image through the glass with the tool!

I gave Jennie a big kiss and a hug, 'cuz she's totally brilliant!

Of course, IIII don't have any Lutradur, and I haven't been able to source any here in the past - not to mention - I don't have this handy burning tool, and also - the Lutradur is white.  So stay tuned for more problem solving...

Photobucket
6
Share
Okay, this post could not be me MORE unrelated to anything that I do, or possibly, anything that you're interested in, but, BUT - I  had to share these with all of you.

You know, like when you get an earworm and the only way to get rid of it is to sing it someone else? Like that.


You see, I'm terrified (TERRIFIED) of ventriloquist's dummies.  I once ran wildly into four lanes of traffic in order to escape two women who were walking down the street, in the business section of our fair city...


(not in some hidden-from-view-secret-place-where-scary-people-and-their-toys live), walking along, like, having a conversation between themselves and the entity-of-evil one of them was holding. 

Walking along, like their behaviour, was normal, like the terrifying thing with them was normal, like THEY (supposedly) were normal.


Anyway, I too was walking along, enjoying the sunny day, glanced over, and promptly ran into six lanes of traffic to get away from them. The only reason I survived, I'm sure, is because I didn't actually run but rather, flew across that street.

I was still shaking by the time I got back to the office.

And NOW do you see why they're so terrifying? THESE ARE THEIR TRUE FACES.

Let's all send collective blessings to my "friend", who thought it would be funny to garner these vintage images from the shadowy recesses of the interwebs and send them to me!

And believe it or not, I may have to do a quilt series on these in order to exorcize the fear. (Some day, when I'm brave enough to be alone with these images!)

In the meantime, have a nice weekend!

(Back to normal posting on Monday, promise, promise!)
10
Share
I am having  ISSUES.  lol


I continue to work on enlarging "Walking While Black" for the looming exhbition date, and because I did the original piece with encaustic and can't for this show, after spending 26 (yes, TWENTY-SIX) hours  making the background and handstitching down all the letters (because I am afeared that the fused letters will not stay on what with being packed and shipped and unpacked and hung and packed and shipped and unpacked and hung and... etc. for two years)...

I have spent a further 22 hours (so far!) trying and failing at different methods to a: enlarge his face and b: give it the distressed look of the original.  So far, no joy.  I haven't been photographing the process because I have (wrongly) assumed each time that it would work. 

So unfortunately, you can't learn from the carnage.  That said, I brought it to last night's Drunken Quilters meeting and Jennie Wood had some GREAT ideas which we're going to try out at her place tomorrow night.

I promise to photograph that process. 

And then, the large new piece that I was working on has ALSO gone awry. I'll show you pics of that tomorrow... haven't had a chance to upload.

Aiyee!

Photobucket
5
Share
I  wasn't going to join the festival this year as I have wandered away from making bed quilts for awhile, but happily for me, Amy has an art quilt category this year, so here I am!

Ontotlogy Of A Rabbit (c) 2012 Kit Lang

This little art quilt came about as a result of a challenge set by my contemporary quiltart group (The Drunken Quilter's Society - so called because our meetings occur over cocktails and dinner) - the challenge was to use the contents of a bag of scraps and embellishments given go us by another member; and to use something in it that we had never used before.


I lucked out on my bag with a beautiful rust-printed fabric and a stunning snow dyed poly-silk. The challenge part of the bag for me were the beads! Those who read my blog regularly know that beads are my Waterloo.  I am never able to use them in a way that pleases me, and inevitably, even if I spend hours and days applying them, I end up removing them in the end.

This time, I loved the beads, and so they stayed.


There was also Lutradur in my bag - and I had never used it before. I painted it and used it for the bunny's nose and eyes.  There was also Japanese paper, which I used to delineate the bunny's wings


Some background quilting and a a few of my own scraps from my stash, and I was done.


This little rabbit is very much outside of my oeuvre and unlike anything I've made before (or am likely to make again) but I'm very happy I did!

Thanks so much for stopping by, and do check out the other work submitted in the festival. Thanks so much to Amy for hosting again!

Photobucket

P.S. - Previous entries from newest to oldest are here here, here, here, and here
25
Share
Newer Posts Older Posts Home
Follow

Followers

Subscribe To

Posts
Atom
Posts
All Comments
Atom
All Comments

Find me on Facebook

Kit Lang Art

Promote Your Page Too

Find my work here

Find my work here

.

.

Member of:

Member of:

Popular Posts

  • Incendiary: Marie-Joseph Angelique
    (All pics are clickable for a bigger view) When I left you on Monday , Angélique and Claude had flown, and behind them, the city...
  • Hiraeth
    "Hiraeth"39" x 29" In the late fall of 2012, there was a call for a challenge group I don't belong to - "...
  • The 411, news and information post. :)
    Catch up time!! First of all, as promised, I'll tell you about the meaning behind each of the elements that were part of my Travyvon M...
  • Winter Is Coming
    My little transfer paint piece is complete. I've been reading Game of Thrones and my head is filled with images of that magical realis...
  • My Sewing Room, let me show you it!
    Well, good morning everyone - and welcome to my sewing room!  I'm so glad you decided to come for the tour! :) As you walk in to my...
  • Surprise Giveaway (to all of us! lol)
    Okay, to start with the good stuff... Here's what I'm giving away! No special hoops - if you want it - leave a comment - the...
  • Friday Finish and ANOTHER Giveaway!
    Golden Headed Blackbird (c) 2013 Kit Lang So, first things first: - here's my finished bird - a golden headed blackbird - and che...
  • America Now - Walking While Black
    In the black community in Canada and the US, when certain events happen to our brothers, our fathers, ourselves, we say "Oh ... DWB....
  • Blog Hop - Giveaway!
    COMMENTS CLOSED - Thanks everyone! It's a Saturday post and you know what that means... a surprise giveaway! I'm participating ...
  • Fairy Wren
    All done! Okay, I need to paint in that little stretch on the hem and I also need to paint the sides of the mounting board, but otherwi...

Labels

Angelique aquarelles argh Art Art 2009 Art 2010 Art 2011 Art 2012 Art 2012 Will work for Fire Art 2013 Art 2014 Art 2019 Art 2025 bead embroidery beading behind the green curtain bird series Bloggers Quilt Festival blogging break Bremen babies Briar Rose challenges Charley Harper collage and mixed media commissions completely terrifying things contemporary embroidery discharge disperse dye doh drawing class dum de dum eco dyeing encaustic ephemera er...oops ethereal exhibitions and shows experiments and play fabric dyeing fairy tales fern series festivals n' events First quilt foil For the birds Friday Link Post Friday' S-Linky Post from the discard file Fugitive Media Fun stuff Generation Q Magazine gifts hand -painted fabric hand painted fabric hand painted paper hand work handwork horn tootin' I'm a lucky girl illustration in progress in progress inspiration kit is talky Kit Lang learning Lunchtime project Mermaid Mixed Media mixed media art monoprint needle felting New blog new to me news nqr ONN other sewing paint lutradur and pellon painted lutradur painted lutradur and pellon painted paper painted papers painted quilt painted work paper work paperwork pellon stabilizer and lutradur political pretty stuff process Project Kit PSA Quilts Quilts 2008 Quilts 2009 Quilts 2010 Quilts 2011 Quilts 2012 rust dyed fabric S-A-T-U-R-D-A-Y-DAY SAQA saved me from myself SeeMe Gallery Sewing room shirt piece sketches small pieces Stolen art studio Taking Flight textile painting the 100 day project 2025 the gentle arts the journeymen quilts the process behind the process the100dayproject2025 thread painting totally cute things transfer paint and/or disperse dye Trayvon Martin tree series watercolor watercolor printing watercolour Week Link Post what next? whitewashed Will work for Fire Winging Away wip woman at work working with disposables works in progress world watercolor month 2016 Year In Review
Copyright © 2016 Studio Kit

Created By ThemeXpose | Distributed By Blogger Templates20