Pages

  • Home
Facebook Instagram Twitter
Studio Kit
on "Kinda Blue" (formerly known as "Under the Sea" - who wants to be THAT predicatable? *s*)

I decided to try a new quilting techinque - here's the first block (pics are clickable to "embiggen"):


in the "sashes" between the diamonds, I quilted my familiar meander


It may not be apparent from this pic, but perhaps is in this one, that I couldn't resist my magpie tendancies, I quilted them in silver thread!


Shiny!

I just need to bind this baby and then it'll be ready to go. I'll post a finished product pic very soon.

So, how was your weekend?
6
Share
Photobucket

Over the last little while, I’ve been making my Pay it Forward giveaway gifts. Inspired by some little patchwork squares I’d experimented with in the colours favoured by the first of my three winners, I decided to make her a tote bag. I hadn’t made one before and didn’t have a pattern, but went ahead with it anyway, making it up as I went along. I liked it so well when it was done, that I decided to make some more, and learned a lot in the process. I thought I’d share what I learned with you, so am offering this tutorial for the round tote bag pictured above, about 16 inches across.


To begin, cut four discs that are a ½ inch larger than you want your finished product to be. Although I did patchwork on my other tote bags, I liked this fabric so much that I decided to not break it up. So I cut two discs of the outer fabric and two discs of the lining (a beautiful navy blue silk taffeta). Cut two discs of batting the same size as your fabric and pin your quilt sandwiches. Once done, quilt as desired. I tried something new and quilted something that ended up looking like my Spirograph experiments when I was a kid. When you're done with your quilting, you'll need to cut two sets of six inch wide lengths of fabric that are 3/4 of the circumference of your bag, plus another six inches. In this case, I didn’t quilt these pieces, but in future, I’ll do so.

I did mine in both lining and outer fabric, but you may wish to use a contrasting or complementary fabric instead. Right sides together, sew a 1/4 inch seam along both sides, press, turn inside out and then hem up the ends with a slip stitch or decorative top stitch. If you are quilting this piece, remember to attach your batting strip on TOP of your fabric sandwich so that when you turn it inside out, the batting will be on the inside. Quilt the strips as desired. Set aside one strip.

Taking the other strip, pin it to one side of the disc, outer sides together, remembering to reserve the six inch tail. Photobucket When pinning the strip, don’t forget to balance it so that the portion of strip not pinned to the disc is evenly proportioned, with the open space at the “top” of your design. Sew the strip down. So that the tote would be able to take a fair amount of weight, I seamed each side four times. Once complete, it should like this:

Photobucket

Repeat on the other side. Iron. Photobucket

Next, cut two strips of binding fabric, 2 inches wide and as long as the “mouth” of your bag is. Attach the binding as you would on a quilt, sewing the outside portion first. When sewing the back of the binding on, tuck it behind the batting seam

Photobucket

and fold over. Pin.

Photobucket

Sew!

Photobucket

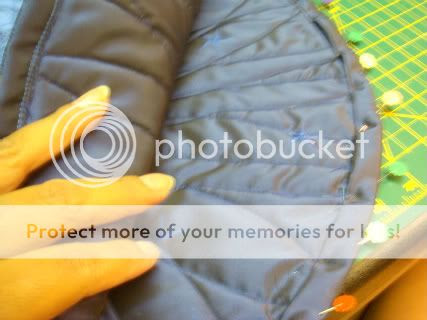
Once that portion is completed, turn the bag right side out again, and following the outside of the disc, sew a seam that encloses the inner seam of batting and fabric sandwich inside a new hem.

Photobucket

On the outside, it will look like this:

Photobucket

And on the inside, it will look like this:

Photobucket

Pretty!

Okay, we’re in the home stretch now. First we’re going to make a loop. Take your six inch tail that’s left over, fold it over on the inside of the bag Photobucket, pleating or gathering the fabric as is your preference, pin and make several passes over it with your sewing machine. You want it to be sturdy!

Photobucket

Taking the long reserved strip (quilted or un-quilted) that you set aside earlier, attach it to the opposite side of your tote bag, in a similar way as the loop you’ve just sewn on. Once your rows of sewing are complete, pull the strip through your loop making sure that the end of the strip will be on the inside of the strap, and adjust the length until it’s a comfortable shoulder to waist ratio. Pin with a safety pin. Sew the strap down, once more using several rows of stitching for sturdyness.

Photobucket

You’re done!

Because the recipient of this gift is a girly-girl (like me), I decided to add a bow, made out of the same silk taffeta as the lining and using similar principals as above: a four inch wide strip, seamed right sides together, turned inside out and pressed. I tied it onto the bag to adjust the tails to the right length and then closed the ends of the tails. I have just tied the bow on as the recipient may wish to remove it at some point, but for myself, I would sew the bow on.

And that was the last of my giveaways for the Pay It Forward project. I don’t know who began this Pay it Forward meme, but I want to take this opportunity to thank them for such a wonderful, tangible way to say “thank you” to the Universe (in my ethos) for the happiness in my life. I was given so much as I worked on these projects, because during the construction of each one, I focussed on all that I’ve been given, and was filled with thankfulness for the joy I have in my life.

Thank you to all who have participated and who will continue to participate in this amazing project. And remember: when you receive something good, or sweet, or lovely in your life, Pay it Forward!
6
Share
Photobucket

I'm taking tonight off to spend the evening with BSP (instead of in my sewing room!), but tomorrow night I'll begin quliting and you know what, I'm going to get this done by the end of the weekend. On time!

The end is nigh. :)
9
Share
you may recall, I was contemplating what to do with this:

fabric

My sister-in-law's birthday is coming up, and I'd asked her to email me what colours she liked (and hoped against hope that I had them in my stash!) As it turned out, she likes blues and turquoises, and I happened to have a stack of those, so at least I had that.

But when you were last tuned to this bat channel, I didn't even have a pattern in mind! Thankfully, inspiration struck on Saturday night as I lay in bed, so on Sunday morning (after a quick trip to Fabricland to pick up some thread and a new rotary cutter), I began cutting fabric until I had this little pile:

the plan begins

(Backing, varigated thread for the quilting, and a couple of dozen 3 x 3 inch squares in three different patterns and a solid.) And then I laid them out in a "pretend" block:

the first block

Well, that seemed to be working! So I sewed it up, cut (roughly) a million more 3 x 3 inch squares and then began piecing a block that was the same, but opposite:

in progress

And some more, different orientations of the same block:

so far

So that's where I am so far. On Monday night, I'll finish the top (I hope) and perhaps even batt it up. And then, the quilting. I have no idea how I'm going to quilt this lovely, although I have spirograph patterns in my head. Perhaps I'll find a way to incorporate them. Who knows?

Certainly not me! :)
4
Share
I came home today and found a package in the mailbox, post marked Australia.

At first, I couldn't imagine who in Australia could possibly be sending me something or why, but then I remembered, the darling girl who started this whole Pay It Forward journey with me, Sandra at Pepperberry & Co.! lives in Australia. Could it be the gift that I had won?

Hurray!

Excitedly, I tore into my package and found these:


A set of lovely linen coasters, made by the equally lovely Sandra!

Thank you so much Sandra, you have given me so much already by introducing me to the Pay It Forward fun, and on top of it all, I get these little pretties! Thank you! They're in use on our nightstands already!

And speaking of pretties, I think that some or all of the turqouise fabrics in this stack of blues are going to be used in my next project


- which is due in ten days. *gulp!*

Crystal at Sonnet Of the Moon Quilts says she can make a lap sized quilt in a week, and I'm going to have to see if I can do the same.

Wish me luck!

ETA: A question: What do you think of the frames on the pictures? Yay or nay?
9
Share
Artsy Mama is hosting an online party to celebrate the release of Tara Frey's book Blogging for Bliss.

This is timely for me in a couple of ways - lately, I have been feeling criticized for wanting to have a "quilting blog" - and this book it total justification for it. *w* And, I have been wanting to improve my blogging skills! (So there! *hee!*)


And anyway - who doesn't love a party!? The party's today - so go on over to Artsy Mama's blog (click the linky on her name above) and join in the party!

And pick up that book! I am! :)
7
Share
Newer Posts Older Posts Home
Follow

Followers

Subscribe To

Posts
Atom
Posts
All Comments
Atom
All Comments

Find me on Facebook

Kit Lang Art

Promote Your Page Too

Find my work here

Find my work here

.

.

Member of:

Member of:

Popular Posts

  • Hiraeth
    "Hiraeth"39" x 29" In the late fall of 2012, there was a call for a challenge group I don't belong to - "...
  • Incendiary: Marie-Joseph Angelique
    (All pics are clickable for a bigger view) When I left you on Monday , Angélique and Claude had flown, and behind them, the city...
  • The 411, news and information post. :)
    Catch up time!! First of all, as promised, I'll tell you about the meaning behind each of the elements that were part of my Travyvon M...
  • Winter Is Coming
    My little transfer paint piece is complete. I've been reading Game of Thrones and my head is filled with images of that magical realis...
  • My Sewing Room, let me show you it!
    Well, good morning everyone - and welcome to my sewing room!  I'm so glad you decided to come for the tour! :) As you walk in to my...
  • Surprise Giveaway (to all of us! lol)
    Okay, to start with the good stuff... Here's what I'm giving away! No special hoops - if you want it - leave a comment - the...
  • Friday Finish and ANOTHER Giveaway!
    Golden Headed Blackbird (c) 2013 Kit Lang So, first things first: - here's my finished bird - a golden headed blackbird - and che...
  • America Now - Walking While Black
    In the black community in Canada and the US, when certain events happen to our brothers, our fathers, ourselves, we say "Oh ... DWB....
  • Blog Hop - Giveaway!
    COMMENTS CLOSED - Thanks everyone! It's a Saturday post and you know what that means... a surprise giveaway! I'm participating ...
  • Fairy Wren
    All done! Okay, I need to paint in that little stretch on the hem and I also need to paint the sides of the mounting board, but otherwi...

Labels

Angelique aquarelles argh Art Art 2009 Art 2010 Art 2011 Art 2012 Art 2012 Will work for Fire Art 2013 Art 2014 Art 2019 Art 2025 bead embroidery beading behind the green curtain bird series Bloggers Quilt Festival blogging break Bremen babies Briar Rose challenges Charley Harper collage and mixed media commissions completely terrifying things contemporary embroidery discharge disperse dye doh drawing class dum de dum eco dyeing encaustic ephemera er...oops ethereal exhibitions and shows experiments and play fabric dyeing fairy tales fern series festivals n' events First quilt foil For the birds Friday Link Post Friday' S-Linky Post from the discard file Fugitive Media Fun stuff Generation Q Magazine gifts hand -painted fabric hand painted fabric hand painted paper hand work handwork horn tootin' I'm a lucky girl illustration in progress in progress inspiration kit is talky Kit Lang learning Lunchtime project Mermaid Mixed Media mixed media art monoprint needle felting New blog new to me news nqr ONN other sewing paint lutradur and pellon painted lutradur painted lutradur and pellon painted paper painted papers painted quilt painted work paper work paperwork pellon stabilizer and lutradur political pretty stuff process Project Kit PSA Quilts Quilts 2008 Quilts 2009 Quilts 2010 Quilts 2011 Quilts 2012 rust dyed fabric S-A-T-U-R-D-A-Y-DAY SAQA saved me from myself SeeMe Gallery Sewing room shirt piece sketches small pieces Stolen art studio Taking Flight textile painting the 100 day project 2025 the gentle arts the journeymen quilts the process behind the process the100dayproject2025 thread painting totally cute things transfer paint and/or disperse dye Trayvon Martin tree series watercolor watercolor printing watercolour Week Link Post what next? whitewashed Will work for Fire Winging Away wip woman at work working with disposables works in progress world watercolor month 2016 Year In Review
Copyright © 2016 Studio Kit

Created By ThemeXpose | Distributed By Blogger Templates20